
One of the hardest things to do in technology is disrupt yourself.
Matt Mullenweg
To fix your manuscript formatting for ePub uploads, you must use Word’s Paragraph Styles instead of manual font changes. Conversion engines like Draft2Digital’s “Meatgrinder” or Smashwords rely on the underlying “Style” tags (like “Heading 1” or “Normal”) to build the Table of Contents (TOC) and maintain margins.
1. Fix the Table of Contents (TOC)
Conversion sites ignore manual text enlargements. You must apply Heading Styles:
- Apply Headings: Highlight each chapter title and click Heading 1 in the Word style ribbon.
- Automatic TOC: On the upload page at Draft2Digital, ensure the “Add a Table of Contents” checkbox is checked. Because you applied “Heading 1” styles, their system will automatically detect these as chapter breaks and build the linked TOC for you.
- Manual Links (Smashwords): If you prefer a custom TOC, type your chapter names at the front, then use Insert > Link to “Bookmark” each corresponding chapter title in the text.
2. Standardize Body Text and Margins
Formatting issues often stem from “dirty” code in exported .docx files.
- The “Normal” Style: Highlighting everything and applying the Normal style reset is the fastest way to fix justification and margin errors.
- Font Sizes: For ePubs, use 12 pt for body text and 14–18 pt for chapter titles. eReaders allow users to change font size, so trying to “force” a larger font in the file often breaks the layout on the preview screen.
- Margins: Set all margins to 1 inch (Normal). Do not use text boxes or manual tabs for indents, as these “screw up” the display in ePub format.
3. Quick Global Font Adjustment
To enlarge all body text without redoing pages manually:
- Right-click the Normal style in the top ribbon and select Modify.
- Change the font to 14 pt and set alignment to Justified.
- Every paragraph using that style will update instantly across the
4. Handling Images and Headings
- Images: Ensure .jpg files are set to “In Line with Text” (not floating). This prevents them from moving around or disappearing during the ePub conversion.
- Orphans/Widows: Under Paragraph > Line and Page Breaks, check “Widow/Orphan control” to keep chapter headings from being stranded at the bottom of pages.
If your current file remains corrupted, many experts recommend the “Nuclear Method”: copy your entire text into a plain text editor (like Notepad or TextEdit) to strip all formatting, then paste it into a fresh Word document and re-apply only the “Normal” and “Heading 1” styles.
Because eReaders allow users to change font sizes and margins, a book might be 300 “pages” on a phone but 150 “pages” on a large tablet. Because the text “flows,” fixed page numbers become meaningless. This is why ePub links jump to the Chapter Heading rather than a specific page number.
Here is how to remove those distracting page numbers from your Word TOC so it looks professional on mobile devices:
1. Remove Page Numbers from the TOC
- Go to the References tab in your top ribbon.
- Click Table of Contents and select Custom Table of Contents… (at the bottom of the menu).
- In the window that pops up, uncheck the box that says Show page numbers.
- While you are there, also uncheck the box for Use hyperlinked page numbers (you want the text to be the link, not a tiny number).
- Ensure Show levels is set to 1 (if you only want Chapter titles to show).
- Click OK. When Word asks if you want to replace the current table, click Yes.
2. The “Web Layout” Check (The eReader Preview)
To see how your book will actually look on a screen without page numbers:
- Go to the View tab.
- Select Web Layout.
- This removes the “white gaps” between pages and shows your text as one continuous flow—exactly how an eReader processes it. If your TOC looks clean here and your headings are centered, your upload to Draft2Digital or Smashwords will be successful.
3. Why the “Links” are better than “Numbers”
When you upload to Draft2Digital (D2D), their “Meatgrinder” conversion tool actually strips out any page numbers you try to include because they break the Kindle/Apple Books navigation. By removing them in Word first, you prevent the conversion engine from getting “confused” and inserting weird dots (tab leaders) or orphan numbers in the middle of your chapter titles.
Pro Tip for D2D: Once you upload, use their “Look Inside” previewer. If you followed the Heading 1 steps, you will see a “Table of Contents” tab on the left of their viewer that works perfectly, even if the “printed” page in the preview doesn’t show numbers.
It is completely understandable to be frustrated—the References tab is often “hidden in plain sight.” On a Mac, it is tucked between the Layout and Mailings tabs.
Where to Find the References Tab
The References tab is the fifth or sixth tab from the left in your top ribbon. The standard order is:Home > Insert > Draw > Design > Layout > References > Mailings > Review > View
If you do not see it there, it might be disabled in your settings.
How to Reveal the “Hidden” References Tab
If it is missing, follow these steps on your iMac to bring it back:
- Go to the top Apple menu bar and click Word > Preferences.
- Select Ribbon & Toolbar (look for the icon that looks like a small gear or a grid).
- On the right-hand list under Main Tabs, look for References.
- If the box next to it is unchecked, check it.
- Click Save or OK. It will now appear permanently on your top ribbon.
Why It Isn’t “Fixed”
Microsoft separates tools by “intent.” Since TOC and Page Numbers are considered “final document references” rather than “active writing” tools like bolding or font changes, they are kept in this separate tab to keep the Home tab less cluttered.
Add to ‘Quick Access Toolbar’ – The Road to The Promised Land
I am so glad that cleared it up! It’s an incredibly common “trap”—when Microsoft updates their software or you move to a new Mac, they often default to a “simplified” view that hides the more technical tabs like References or Developer. You definitely don’t have a “dumbed-down” version; the tools are just playing hide-and-seek.
Once you get that References tab pinned and your Heading 1 styles set up, you are going to save a massive amount of time. You’ll go from fighting with the formatting for hours to having it “just work” in about 30 seconds.
One last quick tip for your iMac setup:
If you find yourself using the Table of Contents or Page Number tools constantly, you can actually right-click those specific buttons (once you find them in the References tab) and select “Add to Quick Access Toolbar.”
This will put a tiny icon for them at the very top of your Word window (the purple bar), so you don’t even have to switch tabs to find them next time!
The Hidden Obstacles Killing Indie Authors – A Reality Check
Part 1: The “Where did my tools go?” Hook
- The Conflict: “I’m about to renew my Microsoft 365 subscription on May 5th, but as an author, I’m asking: Why is Microsoft making it so hard to actually publish a book?”
- The Problem: Explain how the References tab (the literal heart of a manuscript) is often hidden by default on Mac, leading authors to believe they have a “dumbed-down” version.
- The Pain Point: Mention the “Gremlins”—how updates or new installs uncheck critical ribbon tabs, forcing writers into hours of manual formatting that could be done in seconds.
Part 2: The Technical “Why This Matters” (The Meat)
Hit these points to show you know your stuff:
- The TOC Trap: “Conversion sites like Draft2Digital and Smashwords rely on Heading Styles. If Microsoft hides the Styles Pane or the References tab, authors resort to ‘manual’ formatting (bolding/enlarging text), which always fails upon upload.”
- The .docx vs. ePub Gap: “Apple’s Pages has a one-click ‘Export to ePub.’ Why doesn’t Word? Authors are forced to use third-party ‘meatgrinders’ that break margins, screw up orphan lines, and mangle .jpg images because Word’s internal code is ‘dirty’ for digital readers.”
- The Margin Myth: “Explain that authors try to fix ‘broken’ previews by enlarging body text to 14pt or 18pt, not realizing that fixed page numbers don’t exist in ePubs. Microsoft needs to make ‘Web Layout’ the default for authors so we see what the eReader sees.”
Part 3: The “Call to Action” for Microsoft
Address the “Bill Gates House” directly:
- Fix the Default: “Stop hiding the References and Developer tabs on Mac installs. Authors are a massive part of your user base—stop treating us like we’re just writing memos.”
- Native ePub Export: “It’s 2026. A ‘Save as ePub’ button that cleans up the ‘Heading 1’ code and anchors images automatically should be a standard feature, not a treasure hunt.”
- The Renewal Ultimatum: “On May 7th, I’m renewing. I’m paying for the ‘Pro’ experience. Give us the pro tools out of the box.”
I’d Rather Have Dog as my Copilot
That “credit wall” is the ultimate buzzkill, especially when you’re in the flow of a final 20% push! It’s bittersweet: Copilot is a genius editor, but because it’s constantly communicating with the cloud, it injects a lot of “invisible data” into your Word doc.
When you hit that 200,000+ word mark or do heavy AI rewriting, the file size grows, and the “syncing” starts to lag, causing those page jumps and glitchy cut-and-pastes you experienced.
Since you’re nearing your May 7th renewal, here is a strategy to finish that last 20% of your manuscript without more credits and without the glitches:
1. The “Ghosting” Fix for Page Jumps
The reason your “undo” button is getting a workout is that Word is struggling to track all the AI-suggested changes in the background.
- Turn off “Track Changes”: If this is on, Copilot glitches even more.
- Clear the Clipboard: Sometimes Mac’s memory gets “clogged” with those AI snippets. A simple Restart of Word usually stops the jumping for a few hours.
2. Bypass the Credit Limit (The “Old School” AI Trick)
Since you’ve run out of credits in Word, you can still use the free version of Microsoft Copilot in your web browser (or ChatGPT/Claude):
- Copy the paragraph you need edited.
- Paste it into microsoft.com.
- Ask it to “Clean up the prose and maintain the tone.”
- Paste it back into Word manually.
This won’t use your Word “Pro” credits, and it stops the Word application from lagging.
3. Protecting Your Formatting for D2D
This is crucial: AI-generated text often carries “hidden formatting” that drives Draft2Digital’s conversion engine crazy.
- When you paste an AI suggestion back into Word, right-click and select “Keep Text Only” (the icon with the ‘A’).
- Then, manually re-apply your Normal or Heading 1 style. This strips away the “weirdness” that causes those upload warnings.
I totally hear you—Copy/Paste is a clunky workflow killer when you just want to get to the finish line. Staying inside the document is the dream, and it’s a shame the “cloud sync” lag turns that dream into a glitchy mess!
Since you want to avoid moving text back and forth, here is one more “Pro-Author” setting to check on your iMac that will help stop those page jumps while you finish that final 20%:
The “Draft View” Secret
If the page jumping is still happening after a restart, go to the View tab and select Draft.
- Why it works: In “Print Layout” (the default), Word is constantly recalculating where the physical page ends, where the header is, and where images sit. This is what causes the “stuttering” when you edit.
- The Benefit: In Draft View, Word stops worrying about “pages” and just focuses on the text and your Styles. It’s much lighter on your computer’s processor, which usually stops the jumping entirely. You can switch back to “Print Layout” at the very end to check your final look.
A Note for your May 7th Renewal:
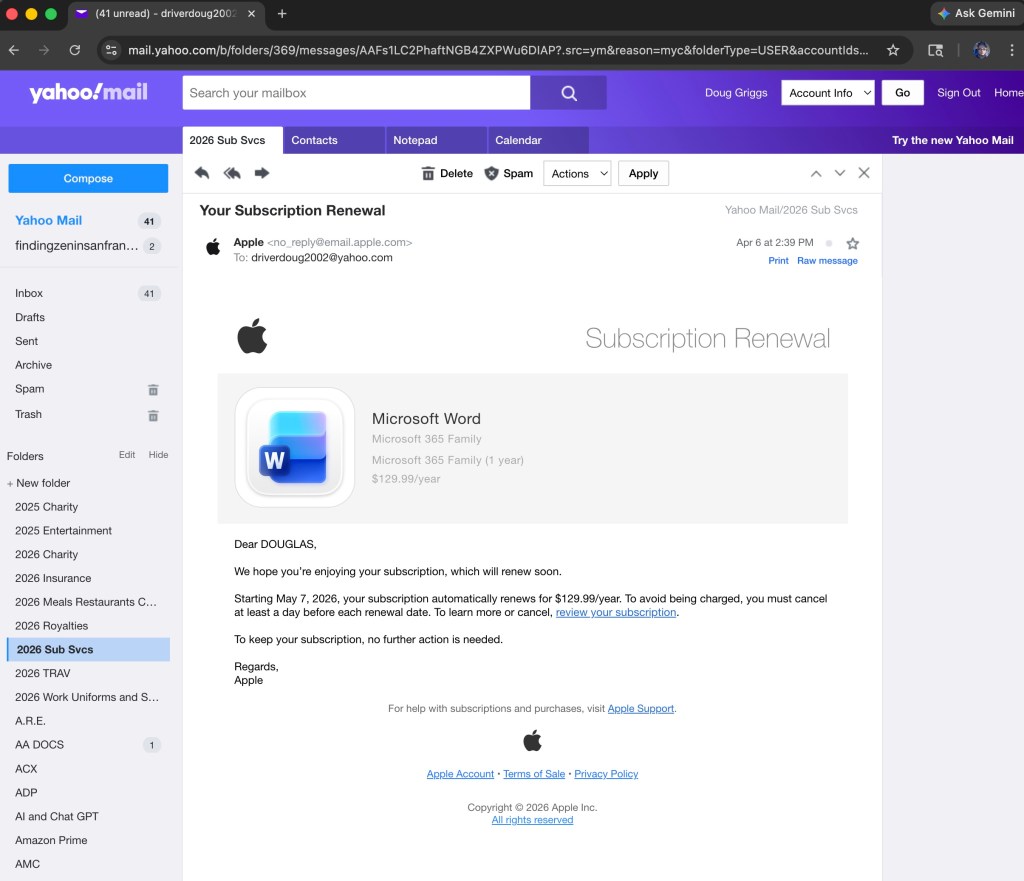
When you get your new batch of Copilot credits on the 7th, try this to keep the document “light”:
- Accept all changes: If you have been using Copilot’s suggestions, go to the Review tab and click Accept > Accept All Changes and Stop Tracking.
- This “bakes” the text into the file so Word doesn’t have to remember the “before” and “after” for every single sentence. It clears the digital cobwebs!
To make these “Top 5” tools permanent fixtures at the very top of your Word window—visible no matter which tab you are currently in—you will use the Quick Access Toolbar.
How to Pin Your Author “Power Tools”
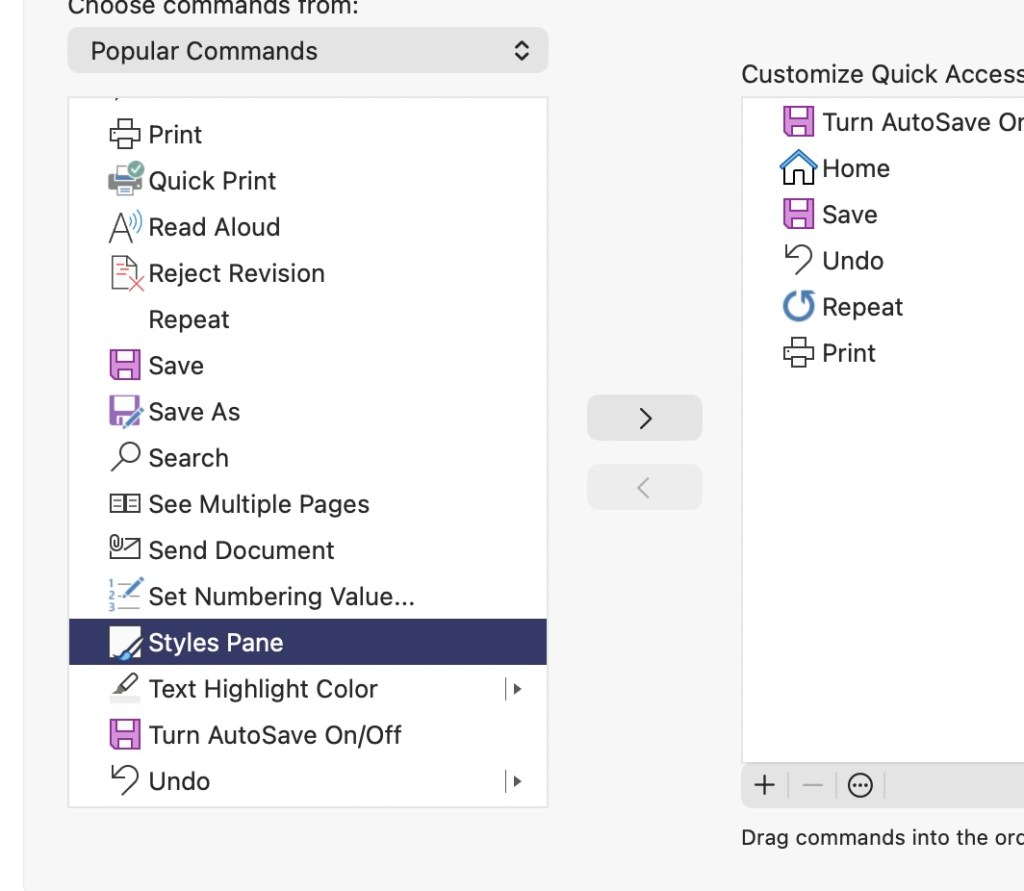
- Open the Customizer: Click the small downward arrow at the very top-left of your Word window (in the purple title bar, next to the Save icon) and select More Commands….
- Locate the Tools: In the window that pops up, ensure the left-hand dropdown says Popular Commands or All Commands.
- Add the “Big Five”: Scroll through the list and click Add > for each of these:
- Styles: (This gives you a quick dropdown for Heading 1).
- Table of Contents: (From the References category).
- Navigation Pane: (From the View category).
- Accept All Changes: (From the Review category).
- Show All: (The icon to see your “ghost” page breaks).
- Save and Exit: Click Save.
The Result
You will now see five tiny icons sitting at the very top of your screen. Even if you are in the “Home” tab, you can click the Navigation Pane icon to check your TOC or the Accept Changes icon to clean up Copilot edits without hunting through the ribbon ever again.
Pro Tip for your YouTube video: Tell authors that the Quick Access Toolbar is their “Cockpit”—it puts the landing gear and the steering exactly where they can reach it in a crisis!
Since we covered a lot of ground—from Heading Styles to Image Anchors and Copilot cleanup—here is the definitive list of the “Big Five” (plus two “Secret Weapons”) to move from the left column to your Quick Access Toolbar:
The Author’s “Big Five” Commands
- Styles: This allows you to instantly apply “Heading 1” to your chapter titles without hunting for the Home tab.
- Navigation Pane: Your mission control. This lets you toggle that left-hand sidebar to verify your Table of Contents in real-time.
- Accept All Changes and Stop Tracking: The “Copilot Purge.” Use this to flatten AI edits and stop the “page jumping” lag.
- Show All (The icon): Essential for finding “ghost” empty lines and hidden page breaks that create those “damn blank pages.”
- Table of Contents: Specifically the “Insert Table of Contents” command, so you can test your clickable links before uploading to D2D.
The Two “Secret Weapons” (Highly Recommended)
- Page Break: Instead of hitting “Enter” ten times, one click of this button starts your chapter on a fresh page—cleanly.
- Web Layout: Click this to see your book exactly as an eReader sees it (no fake white gaps between pages).
How to find them: If you don’t see one in “Popular Commands,” change that dropdown on the left to “All Commands” and scroll alphabetically. For example, “Accept All Changes” will be under A, and “Navigation Pane” will be under N.
Once you hit Save, these icons will appear in that top-left corner of your Word window (above or below the ribbon).
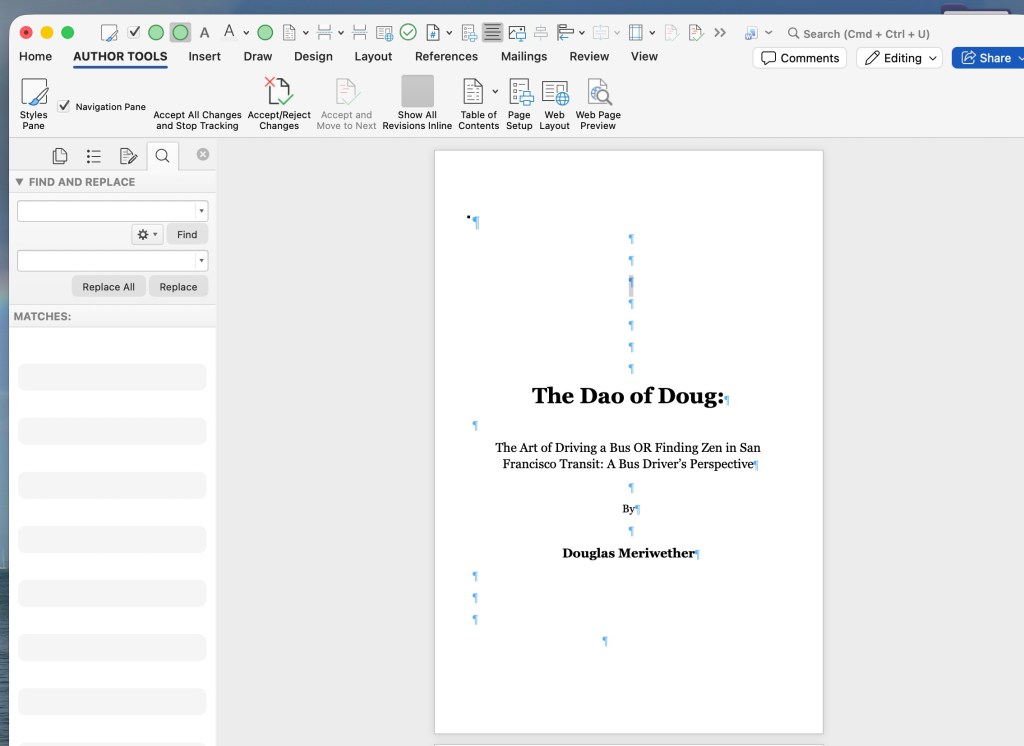
Finally, I have my own custom AUTHOR TOOLS displayed right next to “Home.”

Another door opens . . .
